Sunday, 15 June 2014
Exhibition - Set up and Changes
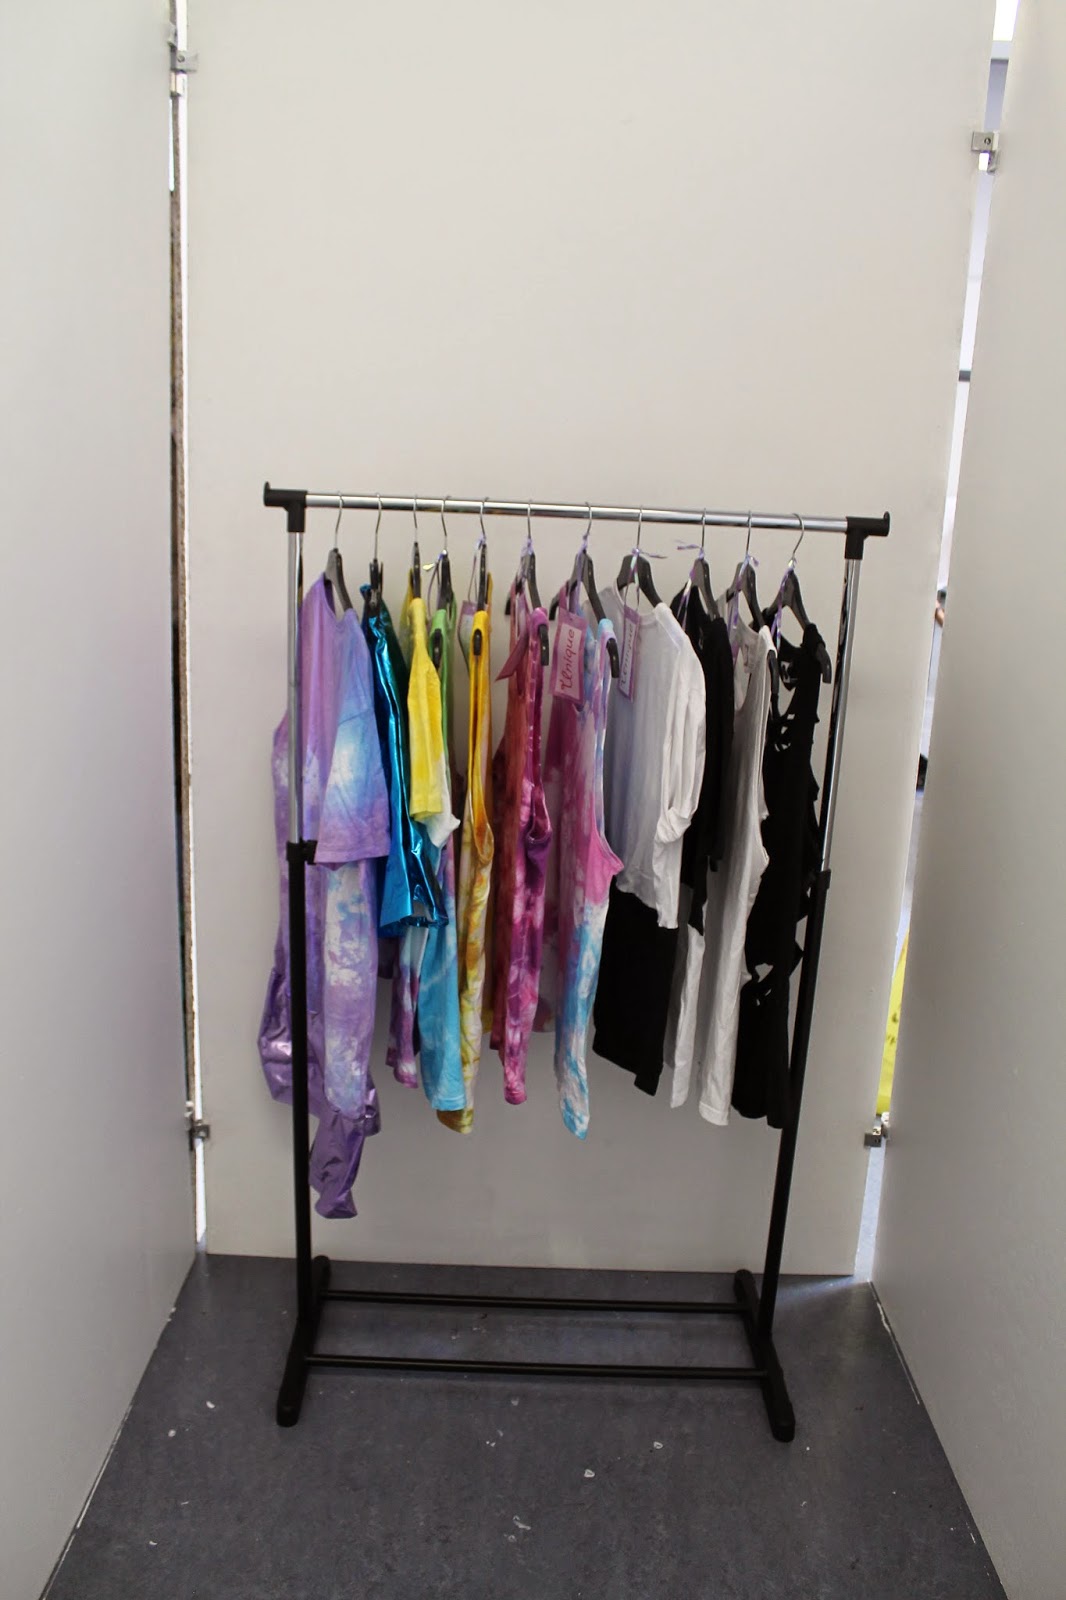
Exhibition - Set up 1
On my original exhibition set up I was going to have a shop as you can see from how the frame has been built. I had planned all this by drawing a shop layout on paper. After see the space and placing a few things inside the layout I realised that my plan wasn't going to work out how I wanted it to be.

I put up a open/closed sign on the front of the shop, as well as a list of opening time for people to come and visit.

Website and Promotions
Promoting the brand.
I'm going to use social media to promote the brand, I am going to use Facebook and Instagram to post image of my products and discounts to lure people towards looking at the products and why them.
Webpage - Selling the Brand
As part of my project I decided to build a brand and shop. I have also created a digital shop on my website @ http://rachbarber.wix.com/unique. I have set the website up using the webpage maker wix.com, I went to the create a business section on page and selected a template I liked, adjusted the layout to how I wanted my site to be.

On the home page I have a direction bar at the top that links to my shop, contact information and question about the brand and business and also the shopping cart so you can see what you have purchased.
Home Page - I have added the details to when my shop will be having a preview opening to show people the brand and what styles I have created. I have also added a link to the brands Facebook page and this blog so that people can see the creative journey I had to go on to make my brand and business.
Shop - In the shop I have three collections to chose from. I have created two style of clothing based on different looks and a small accessories section, which only includes hair scrunchies. My shop is small that is because it is only a small on growing business. I have used studio photography to capture what the products look like on real people.
Monochrome - The monochrome collection was inspired by Vogue, ASOS Magazine and ASOS fashion finder. There are also two vest tops in this collection which are part of the monochrome look but were inspired by Robert Morris and his work 'Untitled 1967-8 remade 2008' using the material felt. { See my research for a better understanding of my inspiration }

Tie Dye -

Scrunchies -
Thursday, 12 June 2014
Studio Photography
Studio photography
I have used the studio to take images for my website. I have used a manikin to display the product on first, but I wanted my product to be shown more realistically.
I then changed how I was going to display my product on my website; I have used a male and female to model the products. I have used studio equipment such as soft boxes and lightings to create a set up to best display my products.
Tie - Dye
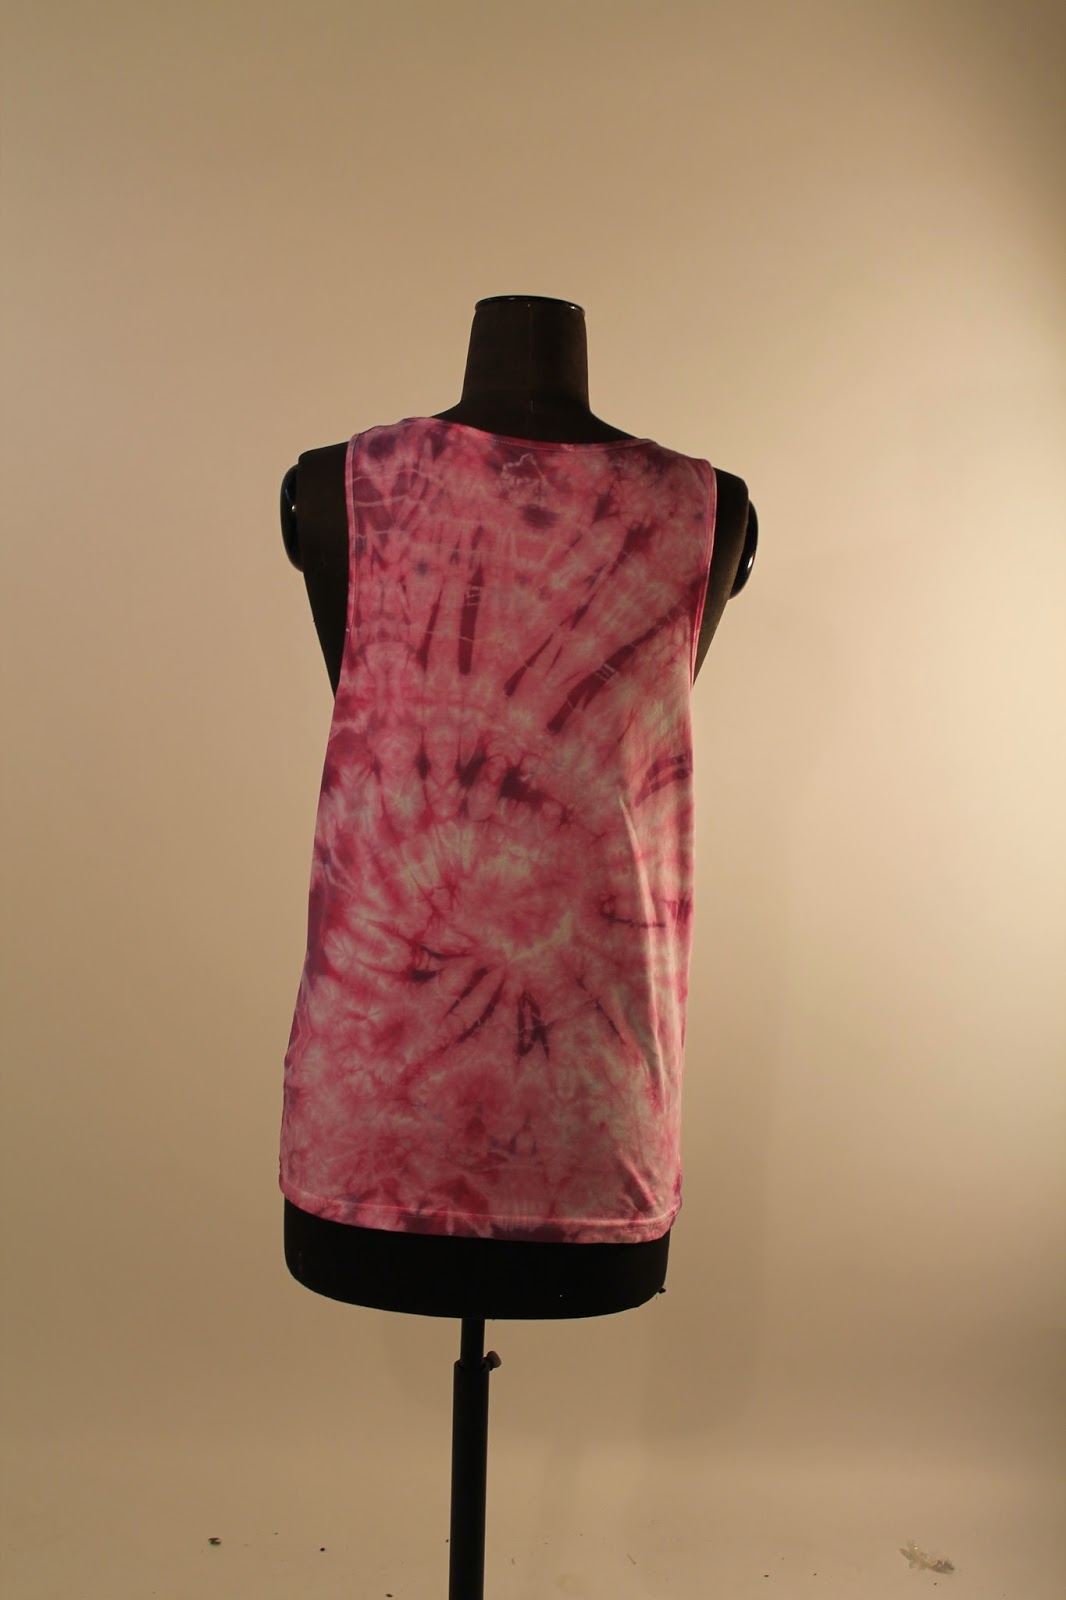
I have used the studio and a makin to take photographs of my final product that i will be displaying in my exhibition. I have take a front view, side view and back view of the product.
Monochrome
Inspired by
Wednesday, 11 June 2014
Metallic - Hair Scrunchies
Photographing the Products
To photograph my products i didn't use the studio or lights to enhance the colouring of my products. I photograph them on top of a white piece of card. I have used the images to place on my website for product display and for people to buy.

Products
My inspiration for creating these designs for part of my collection was from Vogues fashion trends : Mine craft and Asos magazine. I really liked the bright colours that Vogues designers used and picking brigher fabrics for my products was a good choice for me.
I have managaed to create a set of bold, young and unique designs.
To photograph my products i didn't use the studio or lights to enhance the colouring of my products. I photograph them on top of a white piece of card. I have used the images to place on my website for product display and for people to buy.
Products
My inspiration for creating these designs for part of my collection was from Vogues fashion trends : Mine craft and Asos magazine. I really liked the bright colours that Vogues designers used and picking brigher fabrics for my products was a good choice for me.
I have managaed to create a set of bold, young and unique designs.


This material was really easy to sew I didn’t have any problems with running the fabric along the machine. The material choice was inspired by Vogues fashion trends: Mine Craft. I really like the colour of the material when picking it out. I think making it into a hair scrunchie was a good choice; I didn’t want to create a product that was too over powering.


When sewing this material,
I found it really difficult. The material wouldn't sew and the fabric just kept
pulling leaving holes and rips in the shiny fabric. I really liked the material;
I thought it was unique and young. The colours on this material are vibrant and
fit the theme I was going for with creating my brand.


I didn’t have any problems with sewing this fabric also. I really like the materials high shin and sparkle to how it has come out.
Metalics - Making process of Hair Scrunchies
I have captured my development process of how I have created my hair accessories for my line. I have used the same materials that I will be using to create my garment with, these colours of materials all link into my trend research from vogue. I wanted to stick to what I had researched as metals are on trend at the moment I wanted to add this to my line, in more chance of customers buying the products.

I have used a Ruler, pen and Pins to mark and cut a 50 cm by 6cm in all of my fabrics for the scrunches’. I used the pins to pin and mark the top of my material so I could sew at a 1/2cm seam allowance. Before sewing the material I had to make sure that my bobble / hair tie was suitable before wrapping the material to sew.

After sewing at the ½ cm sew allowance and completely going round the whole strip of material till it was secured to the bobble / hair tie. I then used the scissors to cut access thread and also to trim down the access material. After doing this I then need to turn the material inside out to the ‘right’ side of the material.
I then repeated the same technique on my other materials to create a number of different material scrunches’ for part of my line. Here are some of my finished products.

Subscribe to:
Posts (Atom)